[Tutorial] Creating/Using Virtual Menus in FFXIV
Not an update, but a steam controller configuration journey.
This isn't really an update, but a quick tutorial for setting up virtual menus in Steam, to make using a controller that much more cooler.
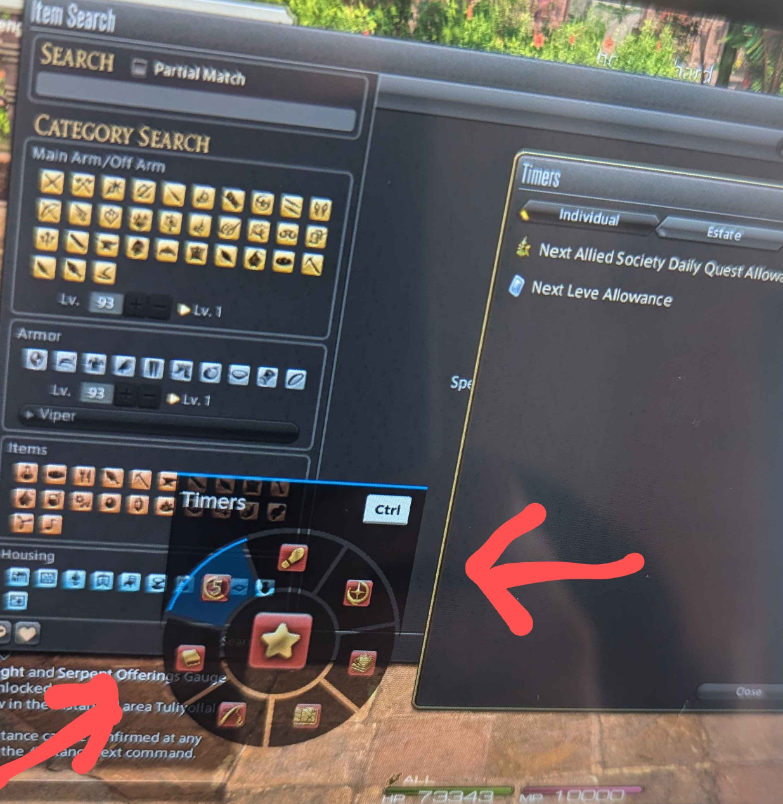
If you've not seen them, this scuffed a.f. example picture shows how Steam's virtual menus can look in game:
An example of a virtual menu for FFXIV
Using a virtual menu, you can make it simple to open/close any windows in FFXIV that have a keybind for them, the same as one might with mouse and keyboard controls, but done simply with your controller.
Step 1, Make a Virtual Menu
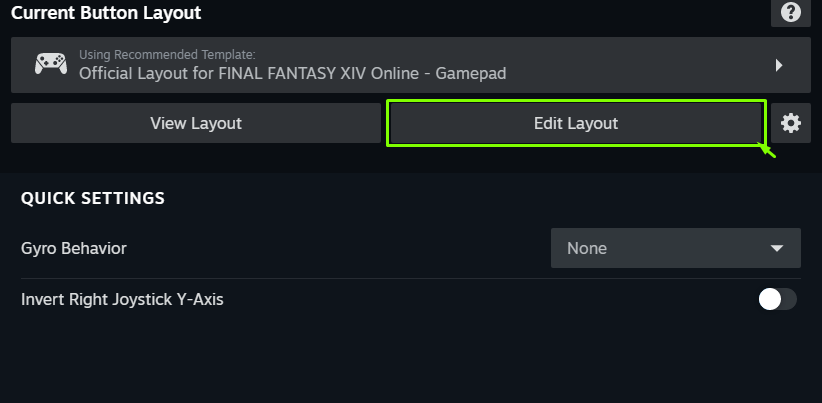
Inside Steam, whether in Steam Deck, Big Picture, or on regular desktop Steam, start by bringing up your current controller layout and go to "Edit Layout"
Edit Layout
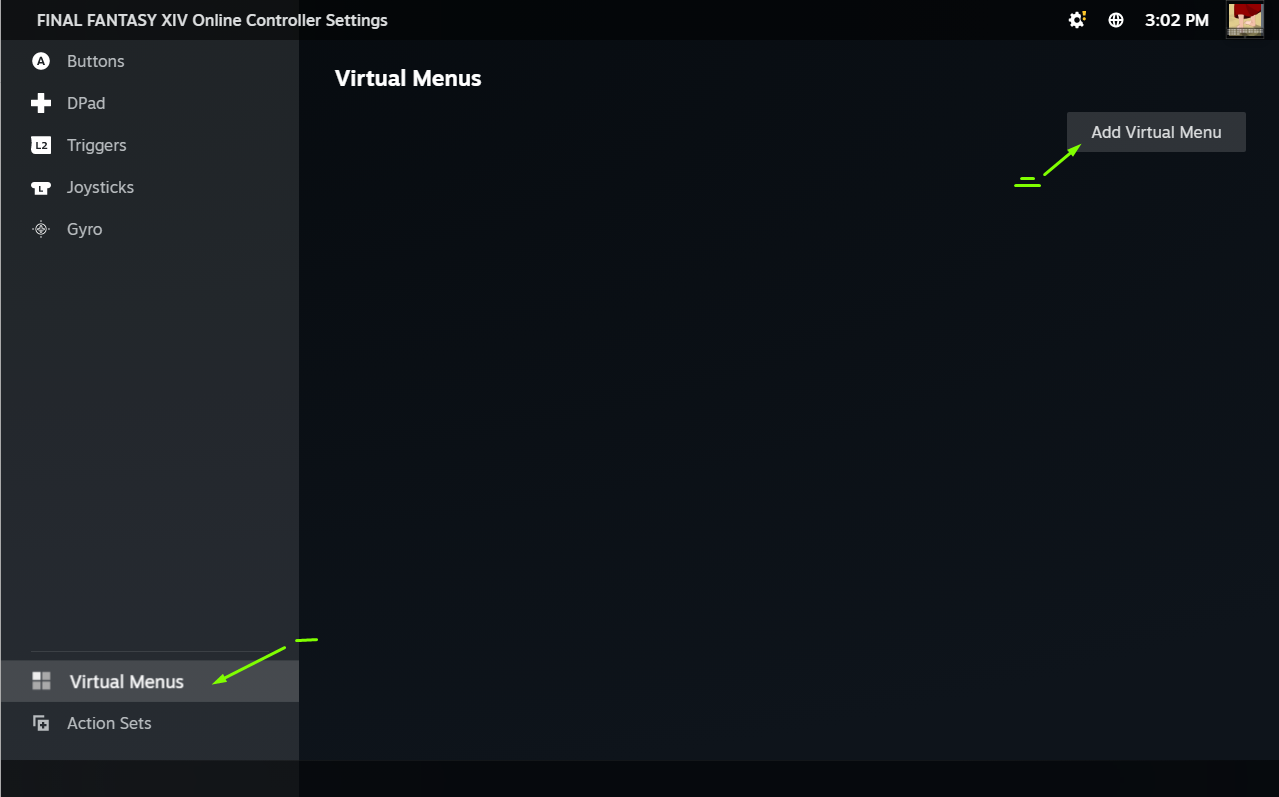
Once you're editing your controller layout, you should have a window like the following.
- Navigate to "Virtual Menus"
- and "Add Virtual Menu"
You will be given a prompt to name the menu. The name won't affect the menu's UI in game, and you can change it later, so call it whatever you want.
As well, you will be given the option for what style of menu it will be. I prefer radial menus, but go with whatever you want, the next steps are the same regardless, it's just the layout on your screen that will change.
Add Virtual Menu
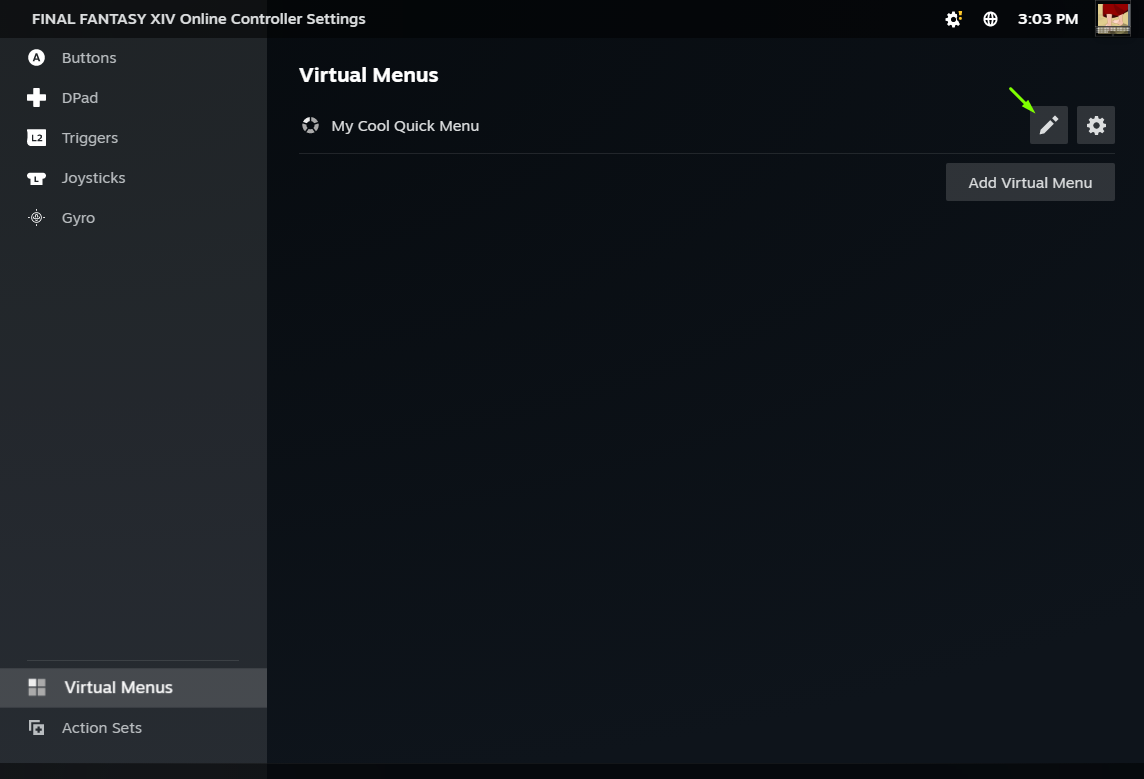
Once you have created and named your Virtual Menu, hit the pencil to actually go in and start adding commands to it.
Hit the pencil
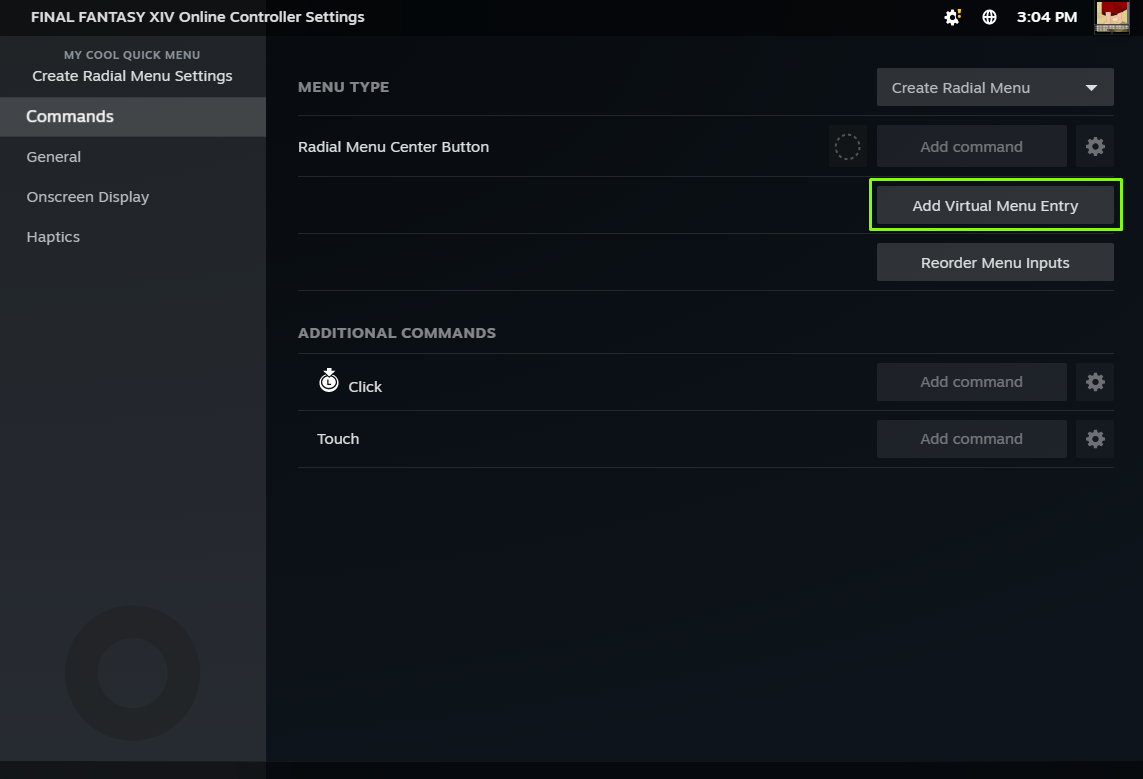
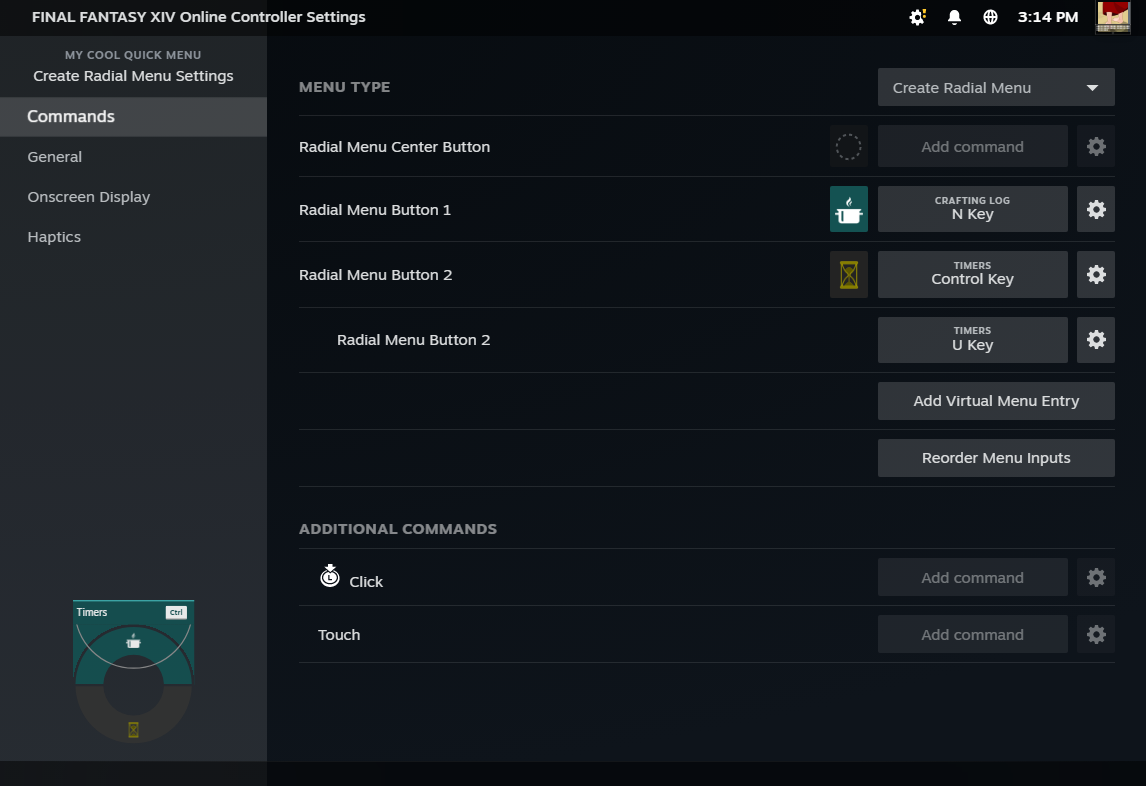
Step 2, Add Menu Entries
Once in the interface for editing your Virtual Menu, you can start adding options to it:
Add Virtual Menu Entry
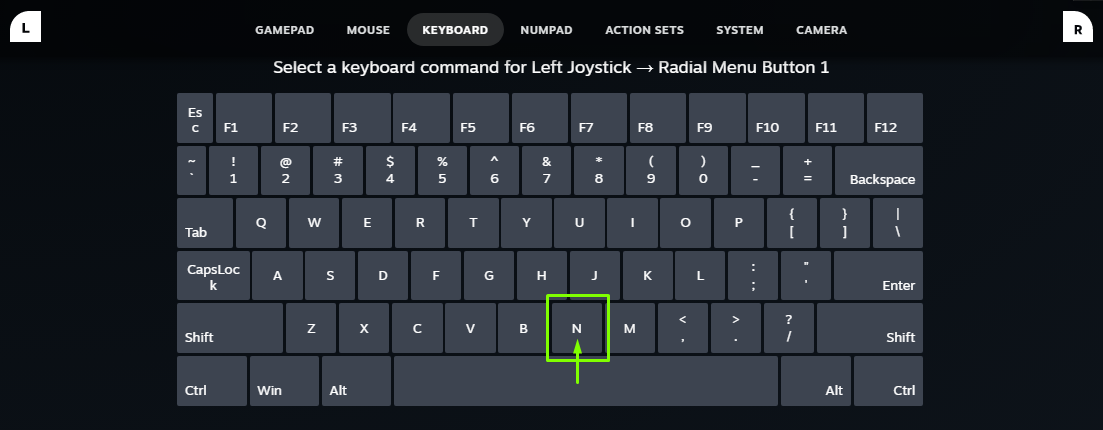
When you select the menu entry in game, it will perform whatever action you set it up to do. That can be a keybind, gamepad button binding, changing something in your steam config, etc.
For this example, we'll want the menu entry to open the "Crafting Log," which is bound to the key N.
Select Keyboard Binding
Once you select your keyboard binding, it will create the entry.
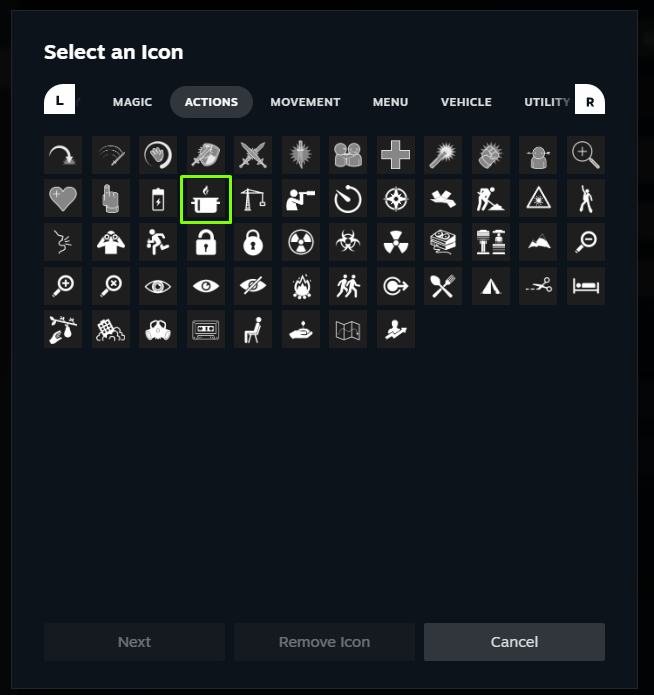
From there the entry is in place, but you might want to hit the gear and rename how the entry shows in the menu, or add a custom icon.
Setup the rest of the menu entry.


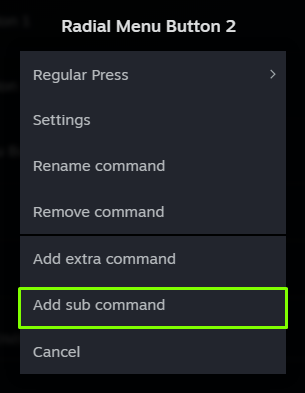
Step 3, Setting up a more complex command (CTRL + U)
Some keybinds in FFXIV need multiple keypresses, such as holding Ctrl and pressing another key, for them to work.
You might have noticed that when we add a keybind, it only adds the one.
This is an easy enough fix with "Add sub command."
For something like the FFXIV "Timers" window, which uses Ctrl+U as a keybind by default:
- Setup and create a new menu entry like before, make the keybind your
CTRLkey. - Hit that gear, and "Add sub command"
You'll then add the keypress binding for the U key.
Add Sub Command
When you're done, your entries can look something like the following:
Finished multi-key entry
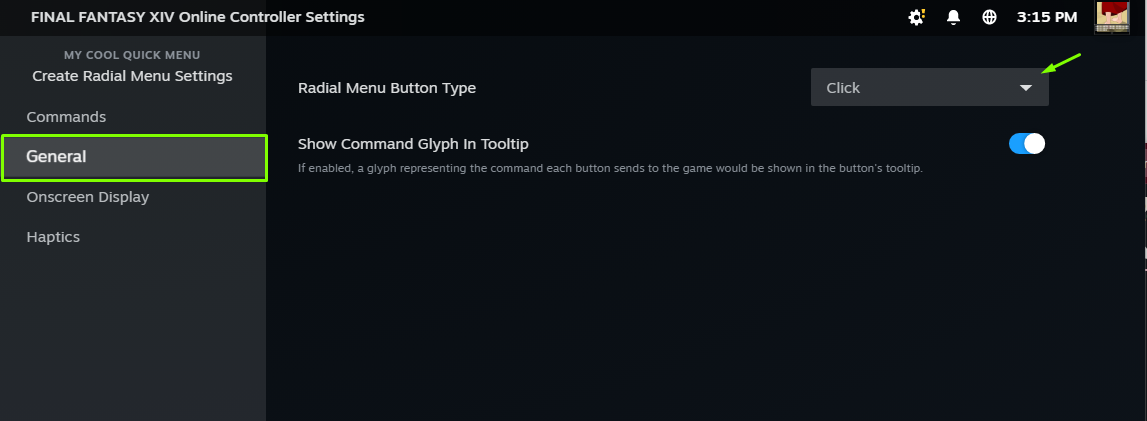
Once you've added menu entries for all the commands you want to have in your menu, you can setup how you want to activating the menu entries in game to work.
I use the Steamdeck's touchpad for my menus, so I like to set the "Radial Menu Button Type" to "Click."
Radial Menu Button Type
Step 4, Actually Use the Menu
On Steam Deck, I set this to one of the touchpads that I would otherwise not be using.
If you head to the configuration section for your trackpad, and choose behavior, your newly created Virtual Menu should show up in there as an option.
IF you don't have an extra unused joystick/trackpad/etc, you can still make use of a Virtual Menu, it just becomes a tad more complicated, because you'll probably set up a keybind and control layer to switch a joystick/trackpad to activating the menu. (Something like R Trigger + R Bumper turning L Joystick into a menu)
I'll upload more images for this later, in a part 2.
posted: 2024-11-19 20:50